Creating and Editing Tables with SSMS
Creating and updating tables in FreeASPHosting.net is quite simple. All you need to do is follow these simple steps, using SSMS.
1
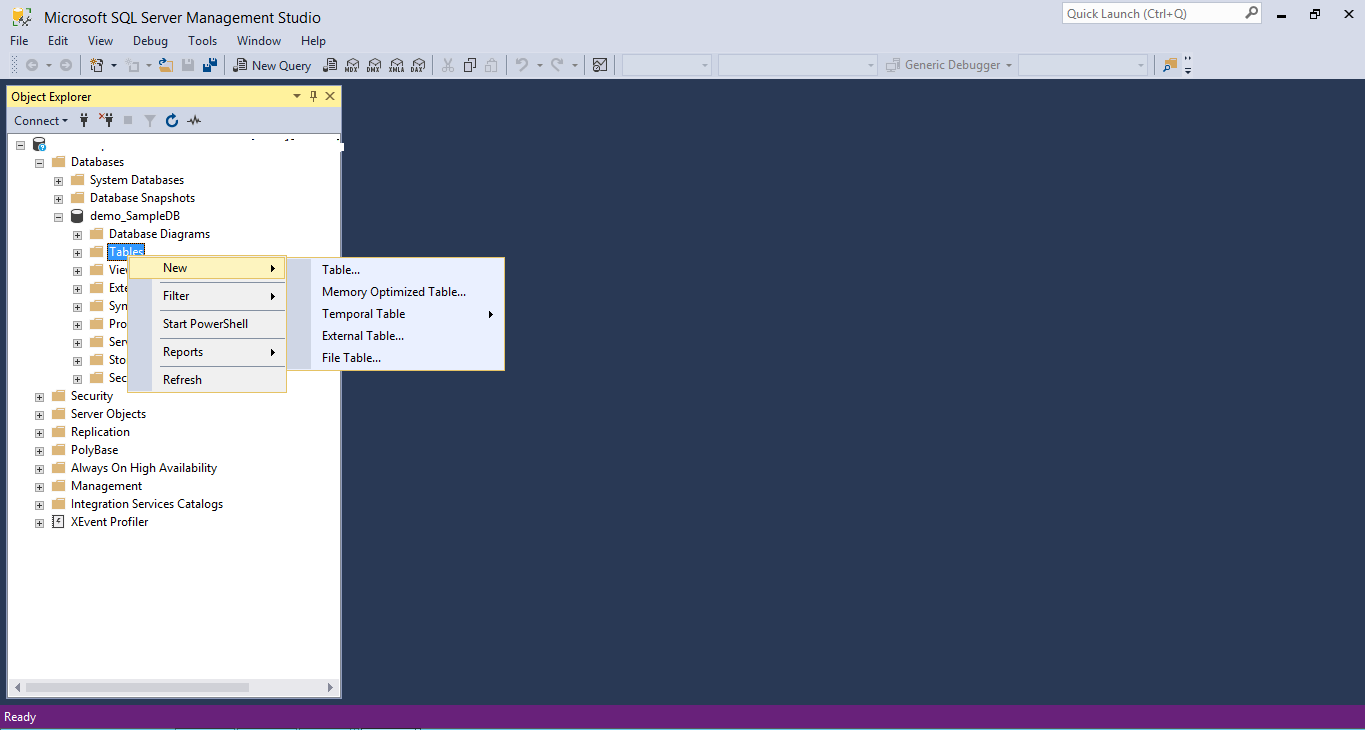
First, log into SSMS and open your FreeASPHosting.net database. If you are not sure how to do it, please refer to the previous section for detailed steps on how to do it.
Click on “Tables” -> New -> Table
2
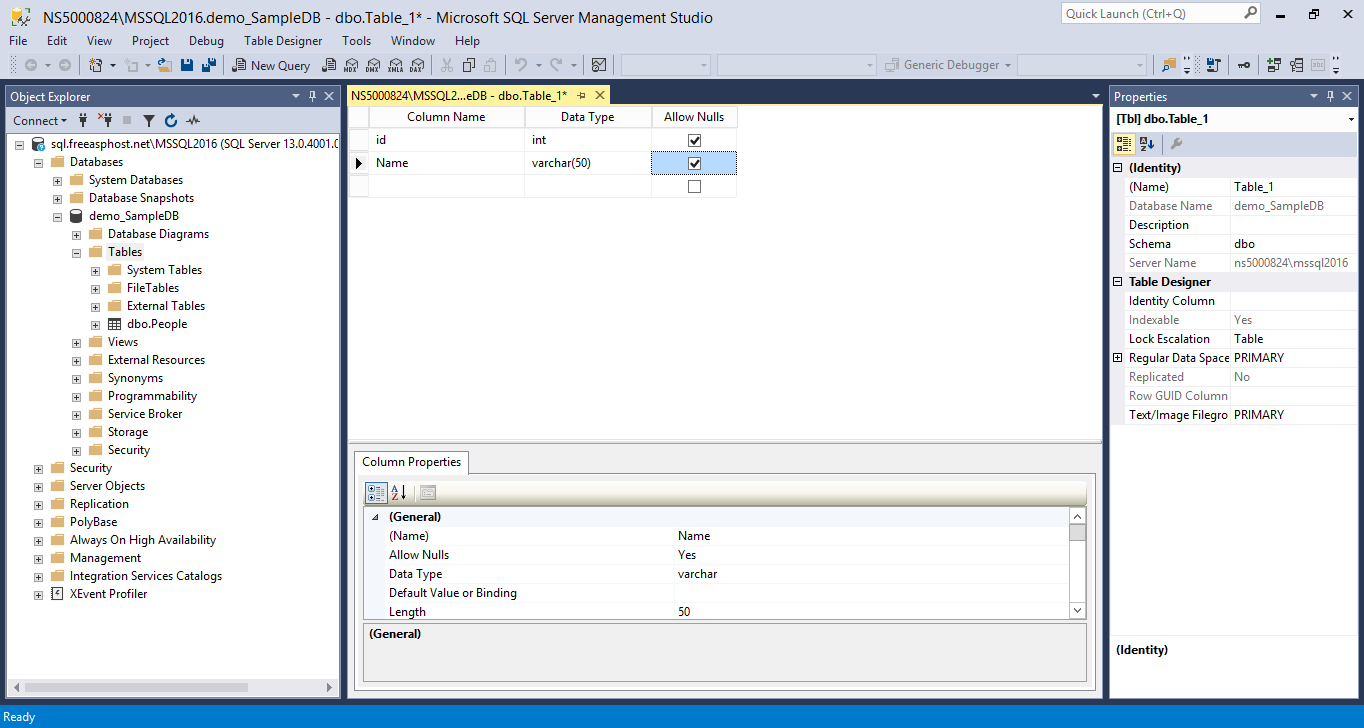
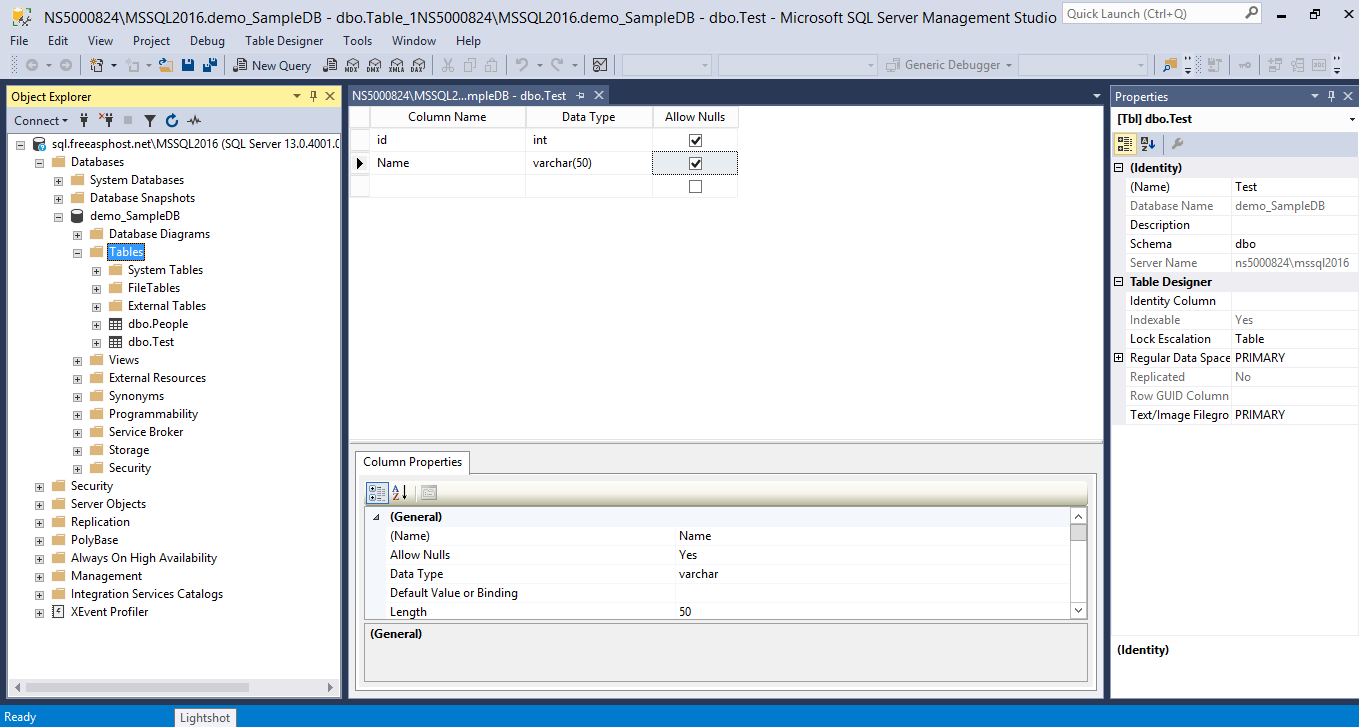
A table is now created with the default name “Table_1”. The right sidebar displays the “Properties” panel, and the middle of the screens is where you can see your table’s structure. You can see a list of columns, and their different properties (Name, Data Type, Allow Nulls).
Let’s add two fields (Columns): ID: with a type of int (integer), and Name: with a type of varchar(50) (which is a text string of a maximum value of 50 characters long).
3
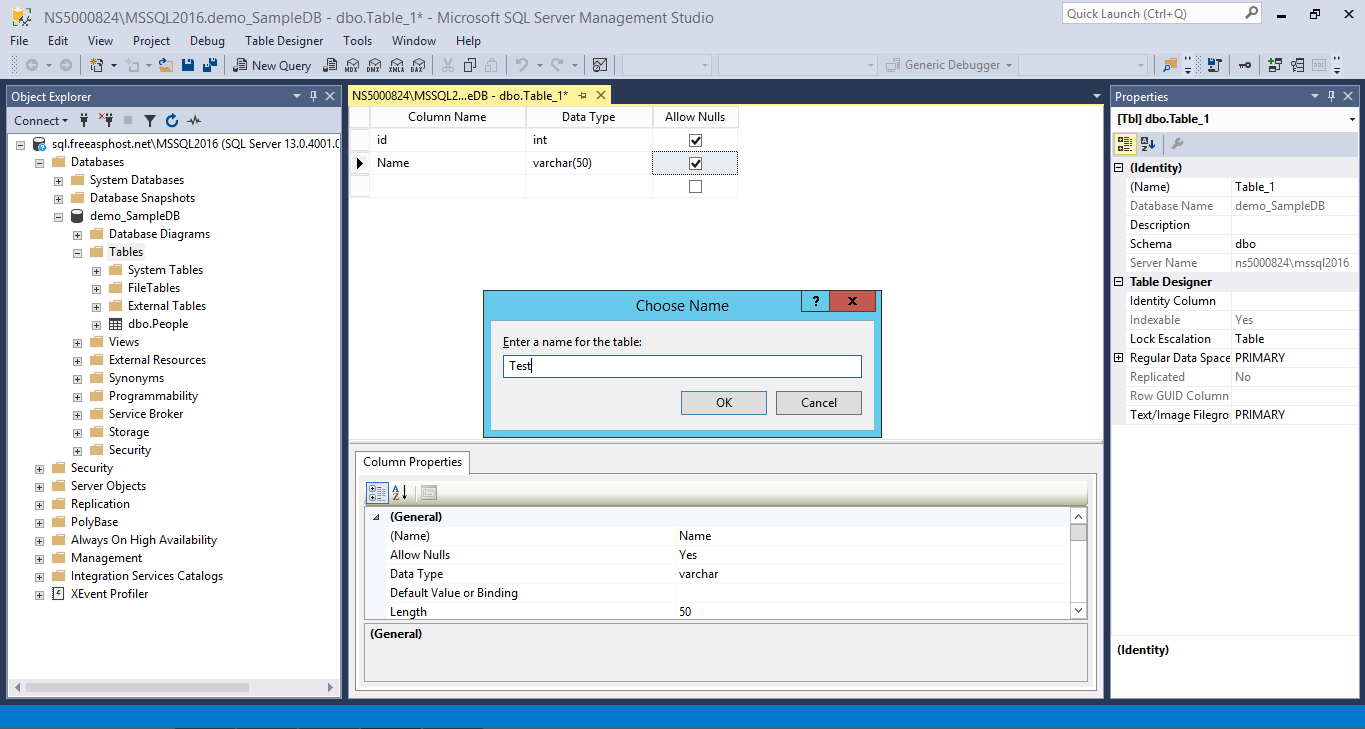
You can add as much fields / columns as you wish, but for the purpose of this tutorial, we will work with these two. Now save the table by clicking on the save button on the tool bar of the SSMS.  You will be prompted to chose a table name: type “Test” and click “OK”.
4
Something weird is happening, we have just created a table, but it’s not displayed on the tables list, did something go wrong? Well actually, everything went good since no error message was displayed. All we need to do is press the “Refresh” button and the table will eventually appear:

5
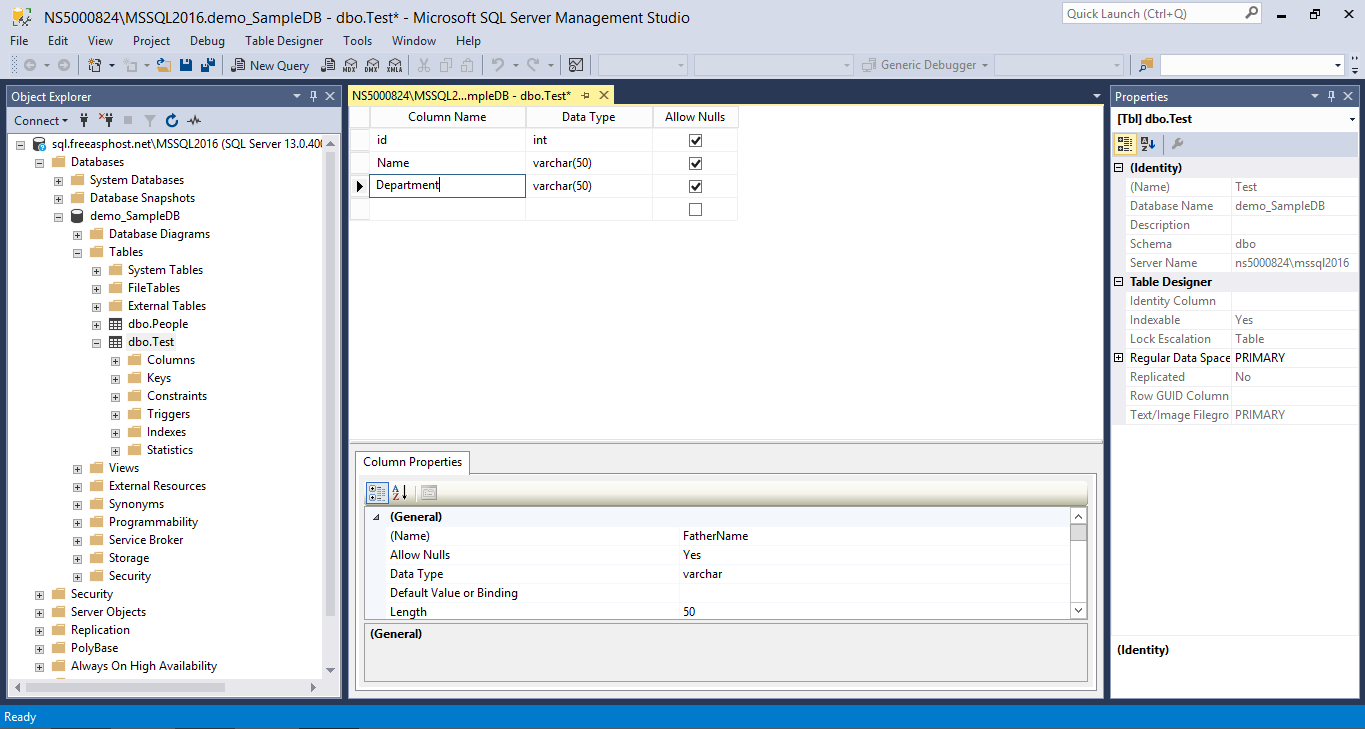
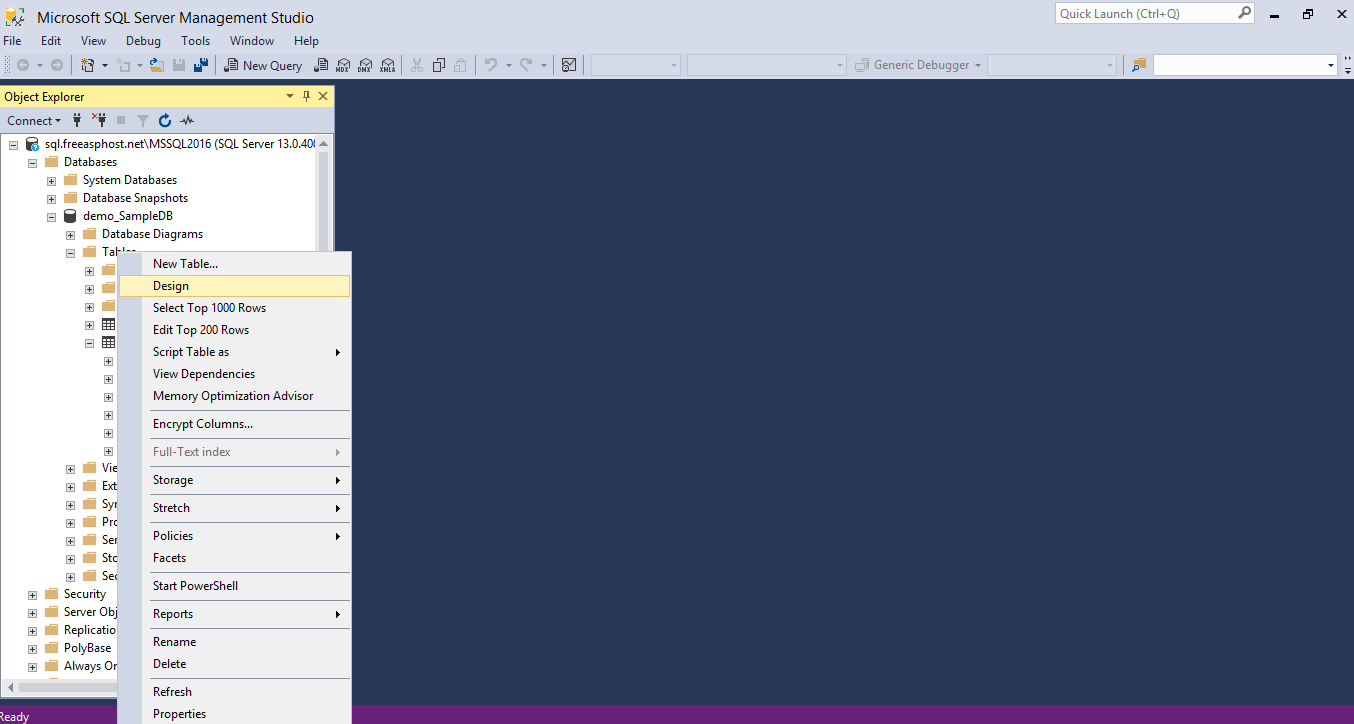
Editing a table’s structure, also called “Altering” is as simple as creating it. Simply right click a table -> Design. This will display the same tool as the creation tool.
6
Now you can add, remove or edit fields / columns. Once you are done, simply hit save and your changes will be applied.